Why You Should Leave Gas Leak Repair to the Professionals

For Gas Leak Repair professional plumbing services should be used. Working with gas lines requires special skills and equipment that only professionals have.

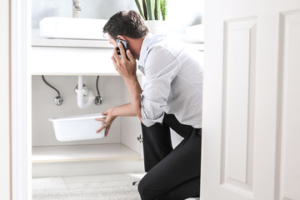
If you suspect a gas leak, it’s important to evacuate your home and call for emergency service right away. While waiting for the plumber to arrive, follow these safety tips:

Leaving the discovery and repair of a gas leak to trained professionals is always the best choice. Even a minor leak can quickly become dangerous and potentially deadly. Exposure to carbon monoxide and methane can cause nausea, dizziness, loss of appetite, and other physical symptoms. In addition, the escaping gas can ignite and explode. When you suspect that a gas leak is present, shut off your electricity and immediately call a professional. Do not search for the source of the leak; doing so exposes you to the leaked gases and could trigger a spark that ignites the gas.

A gas leak can be caused by a number of issues, from pipe corrosion to age and wear and tear. While routine maintenance can help prevent these issues, a problem with the natural gas line that connects to your home may still occur.

One of the first signs of a gas leak is a sulphur-like odour, similar to rotten eggs. The odour is created by the chemical that is added to natural gas for safety reasons. If you notice a smell, it is important to check your appliances and the gas line for a leak.

Other signs of a leak include hissing sounds from appliances, bubbles in standing water or dirt, and visible damage to the pipes and hoses that carry gas. The hissing sound is created by the escaping gas, which escapes through a small hole or loose connection. It is important to listen for hissing and other sound around your appliances and the gas line, and pay attention to changes in your property, such as an unexplained increase in your utility bill or dead plants around your home.

Leaks also appear in the area where a pipe connects to another, such as a shut off valve, tee, union, or flexible supply line. While these connections are generally tight, they can loosen and leak if the pipe is exposed to an external force or subject to pressure from surrounding soil. In general, it is more likely for a leak to occur in older gas lines or where the pipes connect to fixtures and appliances.

A gas leak poses a serious safety risk to those in the affected area. Even if the leak is contained to one room, it could ignite and spread quickly throughout the building or residence. A natural gas leak can also release carbon monoxide, a colorless and odorless gas that is poisonous in high concentrations. If you suspect a gas leak, you should evacuate the area until certified professionals declare it safe to return.

One of the most common signs of a gas leak is a noticeable odor in the air. While natural gas companies add a harmless chemical called mercaptan to their pipeline gas, this isn’t always enough to mask the smell of rotten eggs. If you smell this odor, leave the area immediately and call for help.

Another way to detect a gas leak is to listen for hissing noises. The more the sound is pronounced, the closer you may be to the source. This can be heard near appliances, pipes, and the gas meter. If you hear a hissing sound that is new, don’t ignore it.

It is important to avoid using any sources of ignition, such as light switches or electrical equipment, in the area of a suspected leak. A spark could ignite the leaking gas and cause an explosion or fire. If you must use these items, keep them as far away from the suspected leak as possible and make sure to turn them off completely.

You should also turn off any heating, cooling, cooking, and lighting systems that are in the area of a suspected gas leak. You should also keep flammable objects, such as newspapers or laundry, away from the area. It is also a good idea to keep pets and children away from the area of a suspected gas leak. They might be excited or curious, which can trigger a dangerous reaction.

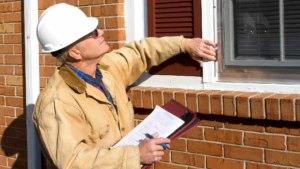
After a certified inspector has located and fixed the leak, they will test for safety before allowing you to re-enter your home or business. They will also tell you if you need to shut off any valves at the meter or near your appliances.

The gas line that runs to your home is important for providing a reliable energy source for heating, cooking, and other household appliances. Unfortunately, these lines can become damaged or leak. It is important to get these problems fixed as soon as possible to avoid potentially dangerous situations like fires, explosions, and poisoning for people or animals living in your home.

There are a number of things that can cause damage to a gas line, including age and environmental factors. Over time, metal lines can start to corrode and develop hairline cracks that will eventually weaken the entire pipe. Additionally, earthquake damage can cause gas pipes to bend or break. In some cases, these lines may need to be replaced entirely if they have become so damaged.

It is recommended that homeowners contact a professional to perform any gas line repair, as it can be extremely dangerous for anyone who does not have the proper training and experience. However, if you choose to work on your own gas line repair or installation, it is important to take the following safety precautions:

Before beginning any work on your gas line, make sure that it is completely turned off. This step is especially important if the line is buried in your yard or underground, as it will prevent you from accidentally exposing yourself to gas and other dangerous chemicals. Next, you should put on a gas mask and gloves before removing the insulated covering from the line to begin working on it.

Once you have removed the protective covering from the gas line, you should clean and sand the surface before sealing it with epoxy. Once the line has been properly repaired, you should reinstall the covers and test it for leaks. If there are still leaks, you can apply more epoxy until you have a completely sealed line.

It is also a good idea to have your gas lines professionally inspected on a regular basis, as this will help to keep them in good condition. It is especially important to inspect them regularly during the summer and winter, when changes in temperature can cause the lines to expand or contract.

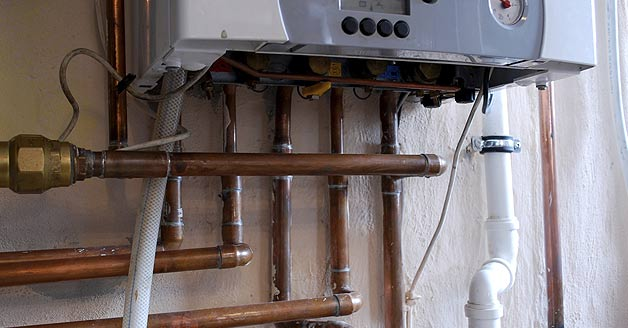
Many homeowners install gas appliances and lines in their home, including fireplaces, water heaters, stoves, furnaces, and outdoor fire pits. It is important that you keep an eye on these lines and connections for signs of a leak, as carbon monoxide can be deadly in large amounts.

Whether you notice the rotten egg smell, hear strange sounds, or have an unexplained increase in your gas bill, these are all signs of a potential problem with your gas line. You should also pay attention to changes in the vegetation around your home, as escaping gas will cause plants to die in the area.

Once you have noticed a possible leak, it is best to contact your local plumber right away. They can perform the bubble test to check for a gas leak. This involves rubbing soapy water on the line and looking for bubbles. You should be able to tell where the leak is by the location of the bubbles.

A plumber can use a number of methods to fix a gas line. One way is to replace the regulator valve. This is a simple job, and it will often solve the issue. Another method is to repair the joints on the pipe with epoxy. This will help to seal the leak and save you money in the long run.

It is important to note that you should never try to work on a gas leak yourself. Working on a leaking gas line can be dangerous, and it can even lead to an explosion. You should always hire a professional for gas line repair in order to protect yourself and your home from this danger.

It is also a good idea to have carbon monoxide detectors installed in your home, as this is an odourless and colourless gas that can be fatal in large quantities. Regularly testing these devices will ensure that they are working properly and are providing you with the level of protection that you need. You should also make sure that you have a professional inspect your home’s gas line on a regular basis to catch any problems before they become serious.

Importance of Refinishing Your Hardwood Floors

Hardwood Floor Refinishing Bergen County NJ restores them to their former glory and helps extend the life of your flooring. This is a project for professional contractors who specialize in this service.

hardwood floor refinishing

Damaged and dull wood floors are magnets for ants, termites and other unwanted pests. The craters and crevices that develop in damaged wood become perfect nesting grounds for these pests.

Unlike recoating, which only involves applying a new layer of finish, refinishing actually sands down the existing wood and takes the hardwood floor back to its original state. It’s a more time-consuming process, but it will give you what is effectively a brand new hardwood floor at a fraction of the cost of replacing it.

Before you start sanding, remove everything from the room (apart from furniture) to make it easier to clean and protect things like radiator grates from sawdust. You’ll also want to cover any fixtures or appliances in the room with tarps so that you don’t accidentally damage them when sanding. Next, sweep the floors thoroughly and dust mop them to get rid of any dirt or debris. It’s important that the floor is pristinely clean before you begin, as any dust left on the surface can cause it to scratch or create a dull finish when you apply the stain. You should also make any repairs to gouges and cracks in the floor.

Sanding the floor isn’t an easy job, and it’s essential to follow all the safety advice in your sanding kit. Wear a respirator or a face mask that can be adjusted to your size and shape, and always follow the instructions on the machine you’re using. A sanding machine with a drum-style sander is best, and it should be fitted with a sandpaper grade and grit appropriate to the floor. A coarse sandpaper is usually sufficient for a general resand, but you may need to switch to finer grits once you’ve gone over the entire surface area. Don’t forget to sand the edges of the room, and be sure to empty your dust bag regularly.

Staining is the final stage of the refinishing process, and this is where you’ll get to decide on the color you want your hardwood to be. Ideally, you should use oil-based stain, as it’s more durable and will protect the floor from moisture. However, if you’re concerned about the environmental impact, there are water-based stain options available that can be used with a varnish that’s low in VOCs.

Staining

A new coat of stain gives your hardwood floors a pop of color and can make the difference between a beautiful and just mediocre floor. Staining is a messy job so you will need to take precautions. Wearing gloves, masks and shoe covers will help keep the mess to a minimum. You should also thoroughly stir your stain before application to ensure that it is well mixed and has the correct color. Different woods react to stains differently, so it is important to test a small section of the flooring before committing to a larger area.

This is a good time to point out that it is possible to stain a hardwood floor without re-sanding it. The process is just a little more time-consuming, and you will need to do some research, but it can be done. You should still sand the floor after staining in order to ensure that the stain has properly adhered to the surface of the wood, and you should also make sure that the stain is a uniform color.

Once the stain is applied it should be left to dry according to the manufacturer’s directions. Once the stain has dried the floor can be wiped down with a damp cloth to remove any dust and grit that may have settled in the pores of the wood.

The final step is to apply a coat of finish. This is usually done with a low-VOC finish, and it should be allowed to dry for 24 hours between each coat. You will need to allow at least three coats of finish in order to achieve a good level of protection for your floors.

It is a good idea to hire a professional to perform the work of refinishing your hardwood floors. A reputable contractor will have an excellent track record, and they should be able to answer any questions that you may have. They should also be bonded and insured. It is also a good idea to check with the Better Business Bureau to see if any complaints have been filed against them. If there are complaints, it is worth contacting the contractor to find out how they were resolved.

Sealing

Before a new stain or finish is applied, the hardwood floor must be sealed. It’s important to use a high-quality, water-based sealant that will not yellow with age and is easy to clean up after. Oil-based polyurethane was the preferred choice for many years, but newer water-based options have improved greatly in terms of durability and moisture resistance. They are also less toxic than the old oil-based ones and have fewer fumes.

Before applying the final coat of sealant, lightly sand the floor again with a very fine grade of sandpaper (usually #220). This will ensure that the second coating adheres properly. Then vacuum the area thoroughly, and wipe it with a damp cloth to remove any remaining residue. Finally, allow the floors to dry completely before moving in furniture or allowing foot traffic on them.

Once the floor is sealed, you can enjoy a clean and shiny surface that will protect the wood from dirt and grime. It will also be easier to maintain and keep looking good than a natural unfinished wood.

When choosing a sealant, consider the color of your wood and what kind of finish you want to have on the floor. Penetrating sealers may be best if you’re concerned about water damage, while glossier finishes are better for those who prefer a more polished look.

If you’re not comfortable doing this project yourself, consider hiring a professional to take care of the work. The right contractor will have the experience and knowledge to do a top-notch job. In addition, they will be familiar with all the tools, techniques and procedures for sanding and refinishing. They’ll be able to help you choose the right stain and finish for your home, and they can provide you with a fair estimate of the cost of the job.

City Floor Supply offers a wide selection of stain and flooring products, including Bona’s full line of dust-free sanding and finishing equipment. They offer a complete package of services, from sanding to sealing, so you can get your hardwood floors looking just the way you’d like them with minimal disruption to your daily life.

Finishing

If you decide to stain the hardwood, it’s important that you do so in a color that coordinates with your other furnishings. It’s also a good idea to choose a semi-gloss finish, which will resist stains and keep the floor looking shiny for longer than a matte or satin finish would. Most stains have a wide range of colors, so it’s easy to find one that will complement your home. If you’re planning to do the staining yourself, be sure to use a good respirator and allow plenty of time for the project. You’ll also want to wait at least eight to 10 hours between each coat of finish, and you may need a week before walking on the floors or placing furniture again.

After the floors have been sanded, cleaned, and scuff-sanded again, it’s time to apply the finish. This process should be done carefully, since the wrong kind of finish can damage the wood. The most popular and durable choice is a polyurethane finish, which comes in both water-based and oil-based formulations. Both of these are easy to work with, but you’ll need to sand the finished floor lightly between coats. A water-based polyurethane has a mild odor and dries more quickly, while an oil-based finish has a strong odor and dries slowly.

You can use either a foam brush or a lamb’s-wool applicator to apply the finish, depending on the type you choose. Vacuum and scuff-sand the floors again between each application, using a pole sander with 100-grit sandpaper for a smooth finish. For a water-based finish, sand the floors with a vacuum and tack rag before applying another coat.

Wax finishes are a popular option in historic homes and among do-it-yourselfers, who like the low-sheen look that it provides. You’ll need to reapply wax periodically, and it can be difficult to buff, but it’s an excellent choice for those who enjoy a more natural look for their hardwood floors. Shellac is a high-gloss option that dries fast and emits few VOCs, but it can be difficult to apply and buff.

What Is a Plumbing Emergency?

Plumbing emergencies can occur anytime and should be dealt with quickly. However, deciding what constitutes a plumbing emergency can be difficult.

Any situation requires immediate attention to prevent further damage or minimize the impact on your household. Here are six signs it’s time to call a plumber. Click https://tidalplumbingnyc.com/ to learn more.

plumbing emergency

It’s a common fear among homeowners – what if your pipes burst? Not only is a burst pipe extremely messy and inconvenient, but it can also lead to costly property damage in a very short amount of time. You’ll know that you have a plumbing emergency on your hands when you start seeing water stains on your walls and floors, or hear gushing water running through your home.

As a homeowner, there are certain things you can do to help manage the situation until professional assistance arrives. The first and most important step is to turn off your home’s main water valve. This is usually located close to your home’s water meter and will stop any further flow of water into your house.

Next, it’s essential to remove any items from the area where the pipe has burst. This will minimize the risk of water soaking into furniture, carpeting, and other items in the area. If there are any electrical gadgets or paper documents in the area, you’ll want to move them away from the spouting water as well.

Finally, you’ll want to shut off the electricity in the area if it’s safe to do so. This will protect against any potential electric shocks from faulty wiring near the burst pipe.

After you’ve turned off the water and electricity, it’s time to get on the phone with a plumber. Make sure to explain the situation and any actions you’ve taken so far to help them assess and resolve the problem as quickly as possible. Also, remember to choose a plumber with high customer ratings and reviews before making the call. This will help ensure that the professional you choose is up to the task and can offer long-term solutions for your home. After the pro comes to your home, you can work together to address any additional water damage and prevent future issues.

Clogged drains are a common problem that can lead to significant damage if not dealt with promptly. Depending on the severity of the clog and the items that are stuck inside of it, a plumber may need to take apart pipes or use specialized equipment in order to remove the clog entirely. It’s also important to note that if the clog is severe enough, it could cause wastewater to back up into fixtures and rooms of your home.

When assessing whether or not a clog is an emergency, you should consider these factors:

Multiple clogged drains suggest that you have a major clog forming in your sewer line. These types of clogs typically happen over time, as soap residue, hair, and other debris accumulates inside of your pipes until they reach a breaking point. If you have frequent clogs, they can also indicate that your plumbing system is overworked and needs a thorough cleaning.

Additionally, if the clog is causing wastewater to back up into toilets and other fixtures, it’s likely a much more serious problem that requires the help of a professional plumber. Wastewater contains dangerous bacteria and viruses that pose a serious health risk to your family. If the clog is severe enough, it can also lead to flooding and water damage within your home.

The best way to avoid a drain clog is to make sure that you’re only using the plumbing fixtures in your home for their intended purposes. Doing this will help keep debris and foreign objects from entering the drains. In addition, it’s a good idea to regularly clean your drain traps and keep an eye out for things like tree roots that can enter and block your pipes. Finally, it’s important to know where your home’s water shut off valves are located so that you can turn off the water to individual fixtures if necessary. This will help prevent further damage until a plumber arrives. In many cases, a simple shut off can make all the difference in avoiding a costly plumbing emergency.

The sump pump is one of the most valuable tools that prevents basement flooding, but it can also be a serious source of water damage when it fails. Several things can cause the sump pump to fail, so it’s important to know what to look for and call a plumber for repair or replacement when necessary.

One common reason for sump pump failure is that the float switch becomes stuck, either in the on or off position. The float switch is responsible for activating the sump pump when the water level rises in the pit, so it’s crucial that this component work properly. Homeowners should check the float switch on a regular basis for debris that could be blocking it and have it cleaned or replaced when needed.

Another common problem with sump pumps is that the discharge line becomes clogged. This can occur due to a buildup of debris in the sump pit or because the discharge pipe has been blocked by ice in winter. Checking the discharge line regularly for clogs and adding insulation to the pipe when temperatures drop can help avoid this issue.

Finally, a power outage can prevent the sump pump from working and leave a basement at risk of flooding. This is a problem that can happen during heavy rains and is why many homeowners install backup generators to keep the sump pump running in case of power outages. Homeowners should consider a battery backup system for the sump pump and have their professional plumbers install a surge protector to protect against power outages that can damage equipment like the sump pump. By taking these preventive measures, homeowners can minimize the risk of a sump pump failure that can cause costly repairs or flood their basements. A professional plumbing service can inspect the pump and provide regular maintenance to help prevent these problems from occurring. Call us today to learn more about how we can assist you with your plumbing needs! We are available 24/7 to answer your questions and schedule an appointment. Our team looks forward to hearing from you!

Water damage is a common plumbing emergency, and it can occur in a variety of ways. It can be the result of a burst pipe, a flooded basement, or even flooding caused by sewer backups. Whatever the cause, it’s a serious issue that needs to be dealt with immediately before it worsens.

Flooding may also cause structural damage to your home, and if it is caused by sewage it can pose health risks as well. If you’re dealing with a sewage backup, turn off your home’s water supply as soon as possible and call a plumber right away.

Hearing banging, rattling, or hissing sounds from your pipes is a sign that they’re leaking or have another problem. These noises can lead to expensive water damage, so it’s important to call a plumber as soon as you notice them.

It’s normal for drains to occasionally get clogged with hair, food scraps, or other debris. However, if your clogged drains don’t respond to a plunger or drain cleaner, it’s time to call a plumber. Clogged drains that don’t go away are a plumbing emergency that needs to be addressed immediately to prevent more damage and potential health hazards.

Nothing is more disgusting than sewage backing up into your home, and it’s a surefire sign that you need to call a plumber immediately. Sewage can cause a variety of health issues, including infections and even death, so it’s essential to call a plumber as soon as possible when you experience sewage backups.

Knowing when a plumbing problem is an emergency can save you time, money, and headaches in the long run. Avoid plumbing emergencies by conducting regular inspections, fixing leaks promptly, educating household members on what should and shouldn’t be flushed down drains, and taking other preventive measures like insulating your pipes in colder weather. By following these tips, you can help ensure that your plumbing system runs smoothly and efficiently. Contact a local plumber for routine maintenance or 24/7 emergency services. They can help you keep your home safe and healthy for years to come.

Interested In Investing In Real Estate? Try These Tips And Tricks

Though market fluctuations can make the world of real estate investing somewhat harrowing at times, it really is possible to generate substantial income by being in the game. To maximize your wealth potential by investing in properties, it is necessary to do your homework. Start with the advice below and never stop learning.

Before you invest in the real estate market, pay attention to what’s going on. It is best to compile information on at least 50 properties from your target area and put this into a spreadsheet. This will make it easy for you to weigh the pros and cons of each property. This will help you figure out which deals are the best.

Never give up if you ever experience a setback with your plan and strategy. The real estate market is filled with many great and bad times, so make sure to stay strong if you hit a lull in your search. Persistence is the key to success when dealing with real estate.

Do not be afraid to spend money on marketing. It is easy to just focus on the numbers and get fixated on how much marketing is costing you. However, it is important to think of the marketing as an investment in and of itself. If done the right way, it will only benefit you in the end.

Always try to find out what the local values are like. Local mortgages and rent rates will teach you more about a property’s value than some financial statements. Looking at the situation from the street level helps you make better decisions.

There are certainly economic times when investing in real estate feels like a never ending roller coaster ride. But, the fact remains that many people find real wealth by staying in the field and working hard. Take the above information to heart and realize your dreams through wise real estate investing.

You can also visit our other websites and post your article.

Gulf Coast Real Estate Sales, Findlay Home Inspector, Sylvania Lighting Solutions, Gary The Carpenter, Household Inspector, San Diego Realty And Mortgage, Miami Fence Company, Milas Pro Cleaning, Moving Direct, Premier Legal Advocates, Howell Jackson Bath Remodel, Seattle Personal Injury Claim, Bernard Doyle Insurance, Brent Lawn Homes, Carlson Craft Cabinets, Casanova Real Estate, Donerite Garage Doors, Electric Fireplaces, Home Builders Evans City, Hometown Heating And Cooling, Homewise Inspections Inc, Mitchell Wellness, Simmons Home Inspections LLC, SO Utah Real Estate, Sure Lock Locksmith, The Helpful Home Inspector, Whites Paver Sealing, Beauty Health Goddess, Belize Real Estate Property For Sale, Best SEO Article Directory, Carpet 1 Lodi, Chilmark Home Inspections, Fitness Babes Daily, Fitness Repair and Realtor, Home Inspector Steven, Inspector Essentials, Kathleen Burke Real Estate Mom, Las Vegas High Rise Condo Homes, Master Marketing PR, Moab Epic, Pheonix-Pressure Wash, Piedmont Home Inspection, Your One Stop Real Estate Blog, Seattle on the Move, SLO Homes, Texas Luxury Limousine Services, Tulsa Mortgages, Champaign Real Estate Sales, Nashville Light and Irrigation, Moore Home marketing

Tips for Cleaning Roofs Safely and Effectively

Roof Cleaning Summerville SC improves your home’s curb appeal and prolongs its life. Cleaning a roof also helps keep shingles looking new and maintains the warranty.

The four main methods of cleaning roofs are pressure washing, soft washing, scraping moss, and chemical solutions. The most important thing to remember is to pre-soak any plants in the area before cleaning.

roof cleaning

Cleaning roofs is a messy job that requires a ladder. It’s important to ensure that it is securely fixed on the building and stable before climbing it. You also want to be prepared for weather conditions such as snow or rain that could hinder workers’ movements and cause slips. In addition, you should provide personal protective equipment (PPE) such as helmets, shoes with traction, and safety harnesses.

When it comes to the actual cleaning process, the focus is on killing and removing the algae or moss growth. This is generally done using clean water, though some roof cleaners are available with dilutable high-powered chemicals that kill spores and prevent the regrowth of organic growth. It is also possible to use a pressure washer on the roof, but this can erode tile coatings and lead to damage.

After the initial washing, most experts recommend applying a biocide to the roof, which will inhibit future growth of moss, mould, and algae. This solution will remain in the structure and prevent organic re-growth for years to come.

Many homeowners choose to hire a professional to clean their roofs, and this can be an effective way to get the job done right. Professionals have the knowledge, experience, and all the necessary equipment to ensure that the roof is completely cleaned. In addition, they have the skills to work safely on a roof and will not damage or break tiles that are not needed to be replaced.

A clean roof protects the home from bacteria, mold, and moisture, and it increases the resale value of the property. In addition, it helps reduce energy costs by reducing the amount of heat that is transferred into the house from the sun. It also keeps the shingles from deteriorating, which can result in costly repairs.

When choosing a roof cleaning company, it is important to find one that agrees to cover any tiles that are accidentally damaged during the process. This is especially important if the roof has to be accessed via a ladder or rope access, and it can save you a lot of money in the long run.

A lot of cleaning professionals use chemicals to keep their roofs free from moss, mildew, algae, and other organic growth. These cleaners are sprayed on and left to do their work. They are effective, quick, and do not require any heavy machinery or teams of laborers to carry out the task.

The most common type of chemical used by professional cleaners is chlorine bleach. It is diluted with TSP, an enhancer, alcohol, and surfactants, and then sprayed on the surface of the roof with a pressure pump that’s usually not more than 100 psi. This type of cleaning is considered safe for the majority of shingles, and it does not void a roof warranty.

There are also other types of chemicals that can be used to clean your roof. These include ammonia, copper sulfate, and trisodium phosphate. They can be harsh, but they are very effective at removing the stains that are caused by molds and algae. They are often combined with surfactants to make them safer for the plants that can grow in the vicinity of your roof.

To clean your roof, you can also use other kinds of chemicals. These consist of trisodium phosphate, ammonia, and copper sulfate. Although they can be abrasive, they work wonders at getting rid of mold and algae stains. To make them safer for plants that may grow close to your roof, they are frequently mixed with surfactants.

However, the chemical-based products can be very dangerous to the plant life around your home. If you have a garden or other types of vegetation surrounding your roof, the run-off from these chemicals can kill them. To avoid this, you can cover them with plastic prior to applying the cleaners.

Some of the other cleaners that are referred to as “soft wash” are sodium hypochlorite and vinegar. These are safe for the plants if they are diluted with water before using them. However, if they are applied undiluted, they can be abrasive on the surface of your roof and cause damage.

Another option that you have for cleaning your roof is to have a biocide treatment done. This process disrupts the membrane cells of bacteria and fungi, which helps to kill them. This method is not only quick and effective, but it also helps to prevent future growth and stains. It is important to know that this method will not remove moss, mold, or mildew from your roof, but it can help to slow their advancement.

Applying a biocide treatment to your roof is an additional option for cleaning it. This procedure helps to kill bacteria and fungi by rupturing their membrane cells. This technique helps to stop further growth and stains in addition to being rapid and efficient. It’s crucial to understand that while this technique can help impede the growth of moss, mold, or mildew on your roof, it cannot completely eradicate them.

Their shared passion for the environment led to their side project. Research shows that volunteering to remove plastic pollution from beaches is a highly meaningful experience for individuals. However, it is rated lower than other environmental activities in terms of restorativeness. This is due to the extensive use of sifting machines that require long metal screens that are repeatedly shortened throughout the season.

The best way to clean a roof is to hire a professional for the job. This way, mistakes aren’t made that could do more harm than good for the roof and the surrounding property. However, if you’re confident in your ability to take care of the job safely and effectively, there are some tips you can follow.

First, it’s important to wear a full-body harness with a secure anchor point, and to work on a dry day. Working on a wet, icy or windy day increases the risk of falls and damage to your home and property. Also, avoid using high-pressure power washing on the roof or around your house. This can cause damage to the slates and tiles and lead to water infiltration.

To start, gather the necessary equipment and materials. You’ll need a full-body harness, a garden sprayer, a hose with a low pressure setting and a nontoxic, noncorrosive roof-cleaning chemical. A brush and rinsing tool are optional, but can help you reach hard-to-reach spots. If you’re worried about staining, use a solution with a low bleach content.

Next, thoroughly wet any plants or patio furniture that are in the vicinity of your home’s roof and cover them with tarps. This will protect them from the chemicals and help prevent any accidental runoff. Before applying the cleaner, make sure to read the manufacturer’s instructions and follow all safety precautions. Be sure to wear rubber gloves, a mask and protective goggles to prevent eye irritation.

Once the solution is applied, let it saturate the roof for several minutes before rinsing. Then, rinse again and allow it to air-dry. If your shingles have black streaks, these are most likely colonies of algae. However, black streaks can also be caused by moss and mildew.

Regular roof cleaning will extend the life of your shingles, save energy costs and increase the curb appeal and value of your home. Whether you choose to do the job yourself or have a professional contractor do it for you, routine roof cleaning is essential for protecting your investment and keeping your home safe and comfortable.

What to Expect From a Home Inspection

A home inspection is a standard part of many real estate contracts, and buyers can have the right to walk away from a sale within an agreed time frame based on the findings.

Home Inspection Colorado Springs CO looks at a home’s exterior and interior, including crawl spaces and basements. Homebuyers can tag along with their inspectors to learn more about the process.

home inspection

A home inspection report is usually provided after the inspection and may be in a narrative or checklist format. It should be easy to read and understand.

The report will include the inspector’s observations of the structure’s condition and its components. It will note any systems that are not functioning as they should, such as a leaky roof or inadequate air circulation. In addition to noting major issues, the report will provide recommendations for the future of the home. For example, if the roof has a significant number of missing or damaged shingles, it is recommended that the buyer replace them.

It is important to note that the inspection does not guarantee that the home will pass a building code inspection. While the inspector can comment on the adequacy of a building’s construction and standards at the time it was built, confirmation of compliance with current building codes is not the goal of a general home inspection.

During the home inspection, the inspector will examine the structure’s exterior, interior walls and ceilings, floors, windows, doors and cabinets; the roof; attic; and crawl space. The inspector will also check the condition of stairways, railings and decks. The inspector will also look at the electrical system and plumbing; observe sewage, sewer and water lines; and test a fire alarm and carbon monoxide detectors.

It is critical that you have the home’s utilities turned on and that you follow the inspector’s advice for preparing for the inspection. The home should be free of pets and children, as the inspector will need to walk through the attic and crawl spaces.

Some things that are not part of a standard home inspection can be inspected with specialized equipment. For example, a thermal imaging camera can be used to check for moisture-related problems in the attic and crawl space. Other specialized inspections can include a radon test and testing for lead paint, asbestos and mold.

It is important to work with a real estate agent who has experience in working with clients on inspection results and negotiations. It is virtually impossible for a home to come back completely clean from an inspection, so having the right strategy in place can help you and your client move forward with confidence.

The seller is bound by law to disclose any issues that could negatively affect the value of the property. A seller’s disclosure statement can be included in the listing agreement or it may be required by state, local or federal laws. It is usually a form that lists problems that the inspector found during his examination of the home and states whether or not they are considered significant.

Sellers are also required to provide information about the house’s history. This includes any repairs made and their cost, as well as the existence of hazardous materials, such as asbestos or lead paint. Some states have specific requirements, such as requiring sellers to disclose known problems related to radon gas or lead-based paint.

If the seller has a home warranty plan, they can transfer coverage to the buyer upon closing. This could cover the cost of a new roof, water heater or furnace and give buyers peace of mind that any problems discovered after they move in will be covered by the policy.

Having the inspection report can help the seller avoid any unpleasant surprises or disputes with the buyer over problems that were not disclosed. It can also help the seller decide what to do about issues that come up after a home inspection.

If there are problems that need to be addressed, the report can serve as a checklist for contractors who are hired to make repairs. This can save the seller money by allowing them to shop around for competitive estimates. It can also prevent the seller from rushing to make repairs to meet a contract deadline.

A home inspection can alert the seller to any immediate safety issues found before agents and buyers tour their home. It can also prevent 11th-hour re-negotiations that often occur when problems are uncovered during the buyer’s inspection.

If a seller disagrees with the conclusions in a previous home inspection report, they can either attach a note or write an update to the report. However, if they discard the report and refuse to disclose any problems, they could face legal liability in the event that an unidentified problem surfaces in the future.

Homebuyers often make their offer on a new property “contingent on inspections” because it’s a small price to pay for peace of mind. A home inspector provides a professional review of the property’s most significant components (such as the roof, structure, and air conditioning/furnace) before the buyer closes on the house.

A home inspection should not be confused with a home appraisal, which is an evaluation of a property’s current market value. While both of these are important steps in the home-buying process, they focus on different things. A home inspection focuses on the home’s condition, while an appraisal focuses on the market value.

Typically, the buyer pays for the home inspection and may require the seller to pay for a pest inspection as well. Upon completion, the buyer receives a written report that describes the condition of the property. It will also include recommendations for any repairs that should be made. The seller will then be given a chance to make the necessary repairs or to reduce the sales price, depending on the findings of the home inspection report.

It’s a good idea for the homebuyer to be present during the inspection. This will give them the opportunity to ask questions, observe the home inspector, and become familiar with the property. During the inspection, the homebuyer will have a better understanding of the property they’re about to purchase and will be able to negotiate more effectively with the seller.

If the home inspector discovers serious issues that would cost a lot of money to repair, the homebuyer can use the information in the home inspection report as leverage to lower the sales price or request repairs from the seller. However, the homebuyer should be aware that if they waive their right to a home inspection contingency, they also waive any other opportunities for renegotiation or cancellation of the sale contract based on the results of the home inspection.

It’s important for buyers to find a certified home inspector who is licensed by their state and is insured. This will help ensure the inspector follows a set of standards that protect the buyer, and also helps to avoid any potential problems that could arise from an inexperienced or unlicensed home inspector. If possible, buyers should also choose a home inspector who participates in the InterNACHI Buy-Back Guarantee.

The inspector’s report should provide the basis for negotiations between the buyer and seller. However, it is important to understand that the inspector cannot make the home perfect or compel the seller to make any repairs. The inspector’s job is to identify significant issues that should be addressed and to recommend further evaluation by specialists, if needed. In general, buyers should try to negotiate only those items that require major expense and are not a result of normal wear and tear.

Home inspections typically take a few hours and require access to many parts of the house, including the roof, attic, garage, basement and electrical service panel. Decluttering and allowing easy access can help speed the process up. Make sure all utilities are on and that any appliances are in working order. Also, have your HVAC system cleaned and a radon test performed.

During the inspection, you should ask the inspector about his or her qualifications and education. It is also a good idea to ask for references and previous clients. In addition, you can also find out if the inspector is licensed by your state. You can do this by contacting your real estate agent or checking with local licensing authorities.

While you should be present during the home inspection, it is best to allow the inspector to work freely without interruptions. Having a clear picture of what the property looks like is critical to making an accurate assessment. However, if you feel uncomfortable with the inspector, ask your real estate agent to be present as well and act on your behalf.

The home inspection is your one opportunity to get a comprehensive look at the overall condition of a potential new home. It can reveal problems you might not have noticed and make you more confident in your decision to purchase the house. If significant problems arise, you can use the findings as leverage to negotiate a lower price or to walk away from the transaction altogether. However, if the problems are not too severe, you might be able to have them repaired by the sellers after the sale.

Home Inspection

Newest Home Inspection Tips

One of the most important steps in the home buying process is a thorough home inspection. It gives buyers peace of mind and can also be a great negotiation tool.

Getting the most out of your home inspection starts with making it as easy for the inspector as possible. This includes keeping the home clean and removing any obstacles that could get in the way of their work.

1. Don’t Forget the Roof

A good home inspector will spend time examining every part of the house that is accessible. This includes the attic, crawl space and even under decks. However, one area that many inspectors may not pay enough attention to is the roof. This is a problem because issues in this area can have devastating consequences for a buyer, especially if not addressed early.

If the roof is leaking or has missing shingles, it can be expensive to repair. In some cases, the entire roof may need to be replaced. In addition, leaks are a sign that there is water damage in other parts of the house, which can be equally costly to fix.

Other major issues that can be uncovered during a home inspection include pest infestation, electrical problems and plumbing issues. Termites and other wood-destroying insects can quickly make their way through the exterior of a home, while out-of-date wiring can be dangerous if it is not upgraded to accommodate modern appliances. Plumbing problems, on the other hand, can often go unnoticed by homeowners until they become serious issues.

In addition to addressing these potential problems, home inspectors will also look for signs of safety hazards. This is particularly important with the mechanical systems of a home. As an example, Hassard warns that some older homes still have knob-and-tube wiring, which is a dangerous system that runs copper wire through porcelain cylinders attached to wooden beams in the ceiling.

Sellers can do a few things to help a home inspector make their job easier. First of all, they should make sure that all doors are open and that there is access to any areas that require a ladder. They should also remove any obstacles that are in the way of the inspector, like locked gates and fences. Finally, sellers should be prepared to disclose any known flaws in their home. While this goes against some people’s instincts, buyers are more likely to react negatively if they are surprised by a problem that could have been easily disclosed.

2. Take Care of Your Appliances

Home inspections play an important role in today’s real estate market. They allow prospective homeowners to have a clearer understanding of the condition of a home before making a purchase, helping avoid costly surprises down the road. For sellers, they can help ensure their property is ready to be listed and provide a more accurate listing price.

A home inspection is a thorough examination of the condition of a home, from the roof to the foundation. During the inspection, the inspector will check for signs of structural damage in the attic, signs of leaks or moisture in the basement, and other problems that may require professional repair. The inspection also includes a thorough review of the electrical system to look for overloaded circuits and ground fault circuit interrupters (which prevent electrocution or fire hazards).

While it is impossible to predict every problem that could arise in a home, there are some things you can do to make the process go more smoothly. The most obvious is to empty appliances like the washing machine, dryer and dishwasher before the inspection. This allows the inspector to get a better view of these appliances and makes it easier to test them.

Another thing to do is to clean the stove and oven. While this may seem obvious, it is often overlooked by homeowners. A dirty oven or stove will give the inspector a bad impression of the kitchen and can detract from the overall value of the home.

In addition, it is a good idea to flush toilets and run all faucets before the inspection. A clean and working plumbing and electrical system can greatly increase a home’s value and saleability.

3. Clean the Gutters

Keeping gutters clean is one of the best things you can do to prepare your home for a home inspection. It not only prevents the inspector from finding debris like twigs, leaves and moss blocking your downpipes but it will also keep them in good working condition for future use. This is especially important in areas with overhanging trees, aggressive wall climbing plants or a north-facing roof that can quickly develop moss. Regular check-ups are advisable, especially in autumn when leaves fall from nearby trees and a garden hose with nozzle attachment is useful for getting into corners and tight spaces to remove debris.

Leaking gutters can stain the siding on a house and cause deterioration of shingle roofing. They can also cause water to flood into places it shouldn’t be, creating mold and mildew problems. Inspectors are concerned about these problems because they can lead to other expensive issues, like structural damage, rot or even wood destroying organism infestation.

The simplest way to get your gutters ready for a home inspection is to clear them of any blockages, which can be easily achieved using a garden hose and a brush or gutter scoop. This should be done before the inspector arrives, preferably after a rain shower, as this will help to loosen any remaining debris. You should also check for downspouts and drains to ensure they are free of clogs and allow for proper water flow.

If you want to do more, make sure that all the doors and windows are easy to open, that there is sufficient airflow around the appliances, that the garage door is operable and that the attic is clear and accessible. This will give a better impression of your home and help the inspector to find any potential issues with ease.

4. Don’t Get Too Involved

While it is recommended for homeowners to attend home inspections, the last thing you want to do during an inspector’s visit is distract him from his work by checking your email or picking paint colors. “Spending your time in the inspector’s way means you miss what he’s saying and also interrupts his workflow,” says Mease.

In fact, if you operate sinks or appliances while the inspector is testing them, it can alter the response of systems, making him think something is wrong when it’s not. This can lead to false reports and unnecessary expense.

It’s also important for buyers to know what an inspector is looking for, so they can focus on what is most important to them. For example, if you are worried about structural damage, the inspector is likely going to test for that. But, if you have young children, the inspector will be interested in whether they’re safe in the attic or basement.

Home inspectors are trained to examine homes from top to bottom and identify any problems that need to be addressed. They will usually take note of things like leaky roofs, faulty electrical wiring, dry rot and mold damage. They will also evaluate the overall condition of the home’s major features and estimate a life expectancy for items such as the roof, furnace and water heater.

However, there are some flaws that a home inspector won’t be able to catch, such as radon, asbestos and pest infestations. In these cases, the inspector may refer the buyer to a specialist for further evaluation. While there are no legal requirements for sellers to make repairs after a home inspection, lenders have minimum safety standards that a property must meet. And, a home seller that makes the necessary repairs before listing is more likely to get a higher price.

5. Don’t Forget About the Exterior

Anyone who has invested in real estate knows that a good home inspection can make or break a deal. It is important for both investors and buyers to understand what a professional inspector can find and what steps they can take to prepare their homes for inspection. This can help reduce the number of discrepancies in contracts and closing dates, making the process much easier for everyone involved.

For homeowners, the most obvious step is to clear away anything that would hinder access to the areas the inspector needs to check. This includes basements, attics, and furnace rooms. Additionally, the exterior should be free of debris, plant growth, trash cans, and stored items.

Another important step is to repair any issues the inspector will notice. Leaks and water damage are a big concern, as they can lead to structural damage and mold. It is best to get these repairs done before the inspector comes. For example, leaky faucets, water stains on ceilings, and a musty smell are all signs of issues that should be fixed.

Finally, it is a good idea to trim shrubbery around the house, especially if it is growing close to the structure. This will keep the plants from causing moisture issues, which may lead to mold. It also helps ensure that the inspector can see the entire home when checking for things like a properly working electrical system, GFCI outlets, and shingles.

In the end, preparing your home for a home inspection is the smartest move you can make. It will help ensure that the process goes as smoothly as possible and eliminates any surprises for buyers down the road.