The Cost of Window Replacement

Replacing old windows is a major project that will impact both the exterior look of your home and the level of interior comfort. The best window replacement companies understand this.

The company should offer financing options to help you afford the cost of installation and maintenance. A nontransferable warranty is also important. Contact Maryland Window Replacement now!

Window replacement can be a great way to upgrade the look and feel of your home. However, it can also be a substantial investment. It is important to carefully consider your options before making a purchase. The type of window you choose will impact both your upfront costs and the return on your investment. In addition, several other factors influence the cost of replacing windows.

The window unit makes up 65% to 75% of the total cost of a new window. The rest of the expenses come from installation. Labor rates vary by state, and a job’s complexity will also affect labor costs. For example, installing larger windows may require more work than smaller ones. In addition, removing and disposing of the old window can add to the overall project costs.

A new window will improve your home’s energy efficiency and reduce its utility bills. It will also increase the value of your home and boost its curb appeal. However, before replacing your windows, ensure they need repair or replacement. A few signs that your windows need to be replaced include a drafty feeling, condensation, and higher energy bills.

In general, double-pane insulated windows cost about $400 each with installation. Triple-pane insulated windows are more expensive but offer better energy efficiency. If you’re considering upgrading to an insulated window, ensure it is Energy Star-certified to ensure maximum savings.

The frame material of your window will impact the total installation and materials cost. Vinyl frames are the most affordable, while fiberglass and wooden frames are more expensive. Fiberglass and wood frames are also more durable than vinyl. However, they do not offer as much insulation as vinyl.

Other factors that can drive up the cost of a window replacement include customizations and additional features such as energy-saving coatings. You can also expect to pay more for a bay or bow window than a standard single-hung window. Additionally, if you have to remove and replace siding or drywall, this will add to the total project cost.

Some window companies claim that replacing windows with energy-efficient ones can save homeowners enough money on energy bills to pay for the cost of the replacement windows. While this is true to some extent, it depends on the number of windows replaced, the type, and the climate. Moreover, a home with single-pane windows would likely need to replace all of them to see significant savings.

If you’re considering window replacement, it’s important to consider the frame and sash material. Vinyl, fiberglass, and wood frames are the most popular options as they are durable and offer superior insulating properties. Wood windows also provide a classic look that is popular in historic districts and neighborhoods. However, wood is more expensive than other materials and requires regular maintenance.

Double-pane windows with insulating glass and a low SHGC (Solar Heat Gain Coefficient) and U-factor can be the best way to improve your home’s energy efficiency. These windows are ideal for most climates, although homes in extreme climates may benefit from triple-pane or fiberglass models.

It’s recommended to hire a licensed contractor for the installation process. Window installations are complicated, and it’s easy to mess up the installation if you attempt to do it yourself. In addition, a professional contractor can recommend the right window glass, such as insulated or tempered, and help you select a reputable brand that will last decades.

Sometimes, a homeowner can receive rebates on their new window purchase from their local energy company for installing ENERGY STAR-rated windows. These rebates can offset the cost of a replacement window or door and make it more affordable to upgrade your home.

The benefits of window replacement include:

  • Reduced heating and cooling costs.
  • Reduced fading of interior surfaces and fabrics.
  • Increased curb appeal.
  • Improved indoor comfort.

If you want to upgrade your Anne Arundel County home with new windows, contact us today for a free consultation. Our team of experts will be happy to walk you through your options and provide a quote that’s good for a year!

The appearance of your home’s windows is important because they let light enter the house and contribute to its design style. The materials and color of the frames also have a big impact. Window replacement is an opportunity to update the look of your home’s exterior and interior. It is also a great time to consider energy-efficient options that reduce heating and cooling costs.

There are several signs that you should consider replacing your existing windows: a draft, condensation between the panes, or the fact that they are rotting or warping. Another sign is that your energy bills are getting higher. One reason may be that the seals in your existing double-glazed windows are failing and letting cold air in or hot krypton out.

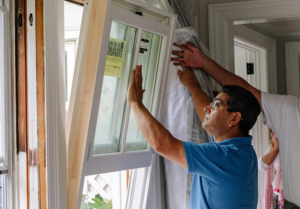
When you decide to replace your existing windows, there are three basic options: sash kits, insert windows, and full-frame windows. Sash kits give your old windows new movable parts and can be used with single- or double-hung windows. The new liners are fastened to the side jambs of the existing window opening, and the sashes are slipped in between. This option is ideal if the existing frames are not rotted.

Full-frame windows have an entirely new frame built around them, and they are used when the original frames are in such bad condition that they must be replaced. It is important to note that this option requires more work than the other two and can be more expensive. When deciding on this option, it is important to consult with your contractor about the conditions of your existing frames.

If you have real wood window frames, they require regular maintenance to keep them in good condition. Leaving them unattended can lead to rotting and other problems that may eventually cause them to collapse. In some cases, the best option is to replace the window.

If a problem is spotted early, it may be possible to repair your windows and save money. For example, if your windows are stuck or hard to open, it could be due to worn cords on sash weights, or the sash itself might have come off the track. This type of repair is usually straightforward for a professional.

You can also reduce the corrosive salt on your windows by cleaning them at least four times yearly with a mild detergent and water solution. This will help prevent damage to the frame and sills.

It is important to check the caulking around your windows for cracks and leaks. These are not only costly to fix, but they can also be a health hazard. If you notice signs of mold or wood rot, these must be addressed immediately to prevent the spread of toxic spores.

Chipped paint is another common window repair issue, but it can be easy to address by hiring a Mr. Handyman of Anne Arundel and North PG technician to sand and repaint the exterior of your home. They can also re-caulk any areas that are leaking.

Fogged windows are often caused by condensation, which you can easily reduce by increasing ventilation. It’s also worth checking for any rot, fungus, or mold in the window frame. Moisture build-up can lead to rot and other structural issues in your home, which is dangerous for your family’s health.

If you have trouble with your windows, consider replacing them with new, energy-efficient models. Window replacement is an investment, but it will be worth the expense of lower heating and cooling bills and a more comfortable home.

Why You Should Leave Gas Leak Repair to the Professionals

For Gas Leak Repair professional plumbing services should be used. Working with gas lines requires special skills and equipment that only professionals have.

If you suspect a gas leak, it’s important to evacuate your home and call for emergency service right away. While waiting for the plumber to arrive, follow these safety tips:

Leaving the discovery and repair of a gas leak to trained professionals is always the best choice. Even a minor leak can quickly become dangerous and potentially deadly. Exposure to carbon monoxide and methane can cause nausea, dizziness, loss of appetite, and other physical symptoms. In addition, the escaping gas can ignite and explode. When you suspect that a gas leak is present, shut off your electricity and immediately call a professional. Do not search for the source of the leak; doing so exposes you to the leaked gases and could trigger a spark that ignites the gas.

A gas leak can be caused by a number of issues, from pipe corrosion to age and wear and tear. While routine maintenance can help prevent these issues, a problem with the natural gas line that connects to your home may still occur.

One of the first signs of a gas leak is a sulphur-like odour, similar to rotten eggs. The odour is created by the chemical that is added to natural gas for safety reasons. If you notice a smell, it is important to check your appliances and the gas line for a leak.

Other signs of a leak include hissing sounds from appliances, bubbles in standing water or dirt, and visible damage to the pipes and hoses that carry gas. The hissing sound is created by the escaping gas, which escapes through a small hole or loose connection. It is important to listen for hissing and other sound around your appliances and the gas line, and pay attention to changes in your property, such as an unexplained increase in your utility bill or dead plants around your home.

Leaks also appear in the area where a pipe connects to another, such as a shut off valve, tee, union, or flexible supply line. While these connections are generally tight, they can loosen and leak if the pipe is exposed to an external force or subject to pressure from surrounding soil. In general, it is more likely for a leak to occur in older gas lines or where the pipes connect to fixtures and appliances.

A gas leak poses a serious safety risk to those in the affected area. Even if the leak is contained to one room, it could ignite and spread quickly throughout the building or residence. A natural gas leak can also release carbon monoxide, a colorless and odorless gas that is poisonous in high concentrations. If you suspect a gas leak, you should evacuate the area until certified professionals declare it safe to return.

One of the most common signs of a gas leak is a noticeable odor in the air. While natural gas companies add a harmless chemical called mercaptan to their pipeline gas, this isn’t always enough to mask the smell of rotten eggs. If you smell this odor, leave the area immediately and call for help.

Another way to detect a gas leak is to listen for hissing noises. The more the sound is pronounced, the closer you may be to the source. This can be heard near appliances, pipes, and the gas meter. If you hear a hissing sound that is new, don’t ignore it.

It is important to avoid using any sources of ignition, such as light switches or electrical equipment, in the area of a suspected leak. A spark could ignite the leaking gas and cause an explosion or fire. If you must use these items, keep them as far away from the suspected leak as possible and make sure to turn them off completely.

You should also turn off any heating, cooling, cooking, and lighting systems that are in the area of a suspected gas leak. You should also keep flammable objects, such as newspapers or laundry, away from the area. It is also a good idea to keep pets and children away from the area of a suspected gas leak. They might be excited or curious, which can trigger a dangerous reaction.

After a certified inspector has located and fixed the leak, they will test for safety before allowing you to re-enter your home or business. They will also tell you if you need to shut off any valves at the meter or near your appliances.

The gas line that runs to your home is important for providing a reliable energy source for heating, cooking, and other household appliances. Unfortunately, these lines can become damaged or leak. It is important to get these problems fixed as soon as possible to avoid potentially dangerous situations like fires, explosions, and poisoning for people or animals living in your home.

There are a number of things that can cause damage to a gas line, including age and environmental factors. Over time, metal lines can start to corrode and develop hairline cracks that will eventually weaken the entire pipe. Additionally, earthquake damage can cause gas pipes to bend or break. In some cases, these lines may need to be replaced entirely if they have become so damaged.

It is recommended that homeowners contact a professional to perform any gas line repair, as it can be extremely dangerous for anyone who does not have the proper training and experience. However, if you choose to work on your own gas line repair or installation, it is important to take the following safety precautions:

Before beginning any work on your gas line, make sure that it is completely turned off. This step is especially important if the line is buried in your yard or underground, as it will prevent you from accidentally exposing yourself to gas and other dangerous chemicals. Next, you should put on a gas mask and gloves before removing the insulated covering from the line to begin working on it.

Once you have removed the protective covering from the gas line, you should clean and sand the surface before sealing it with epoxy. Once the line has been properly repaired, you should reinstall the covers and test it for leaks. If there are still leaks, you can apply more epoxy until you have a completely sealed line.

It is also a good idea to have your gas lines professionally inspected on a regular basis, as this will help to keep them in good condition. It is especially important to inspect them regularly during the summer and winter, when changes in temperature can cause the lines to expand or contract.

Many homeowners install gas appliances and lines in their home, including fireplaces, water heaters, stoves, furnaces, and outdoor fire pits. It is important that you keep an eye on these lines and connections for signs of a leak, as carbon monoxide can be deadly in large amounts.

Whether you notice the rotten egg smell, hear strange sounds, or have an unexplained increase in your gas bill, these are all signs of a potential problem with your gas line. You should also pay attention to changes in the vegetation around your home, as escaping gas will cause plants to die in the area.

Once you have noticed a possible leak, it is best to contact your local plumber right away. They can perform the bubble test to check for a gas leak. This involves rubbing soapy water on the line and looking for bubbles. You should be able to tell where the leak is by the location of the bubbles.

A plumber can use a number of methods to fix a gas line. One way is to replace the regulator valve. This is a simple job, and it will often solve the issue. Another method is to repair the joints on the pipe with epoxy. This will help to seal the leak and save you money in the long run.

It is important to note that you should never try to work on a gas leak yourself. Working on a leaking gas line can be dangerous, and it can even lead to an explosion. You should always hire a professional for gas line repair in order to protect yourself and your home from this danger.

It is also a good idea to have carbon monoxide detectors installed in your home, as this is an odourless and colourless gas that can be fatal in large quantities. Regularly testing these devices will ensure that they are working properly and are providing you with the level of protection that you need. You should also make sure that you have a professional inspect your home’s gas line on a regular basis to catch any problems before they become serious.

Importance of Refinishing Your Hardwood Floors

Hardwood Floor Refinishing Bergen County NJ restores them to their former glory and helps extend the life of your flooring. This is a project for professional contractors who specialize in this service.

hardwood floor refinishing

Damaged and dull wood floors are magnets for ants, termites and other unwanted pests. The craters and crevices that develop in damaged wood become perfect nesting grounds for these pests.

Unlike recoating, which only involves applying a new layer of finish, refinishing actually sands down the existing wood and takes the hardwood floor back to its original state. It’s a more time-consuming process, but it will give you what is effectively a brand new hardwood floor at a fraction of the cost of replacing it.

Before you start sanding, remove everything from the room (apart from furniture) to make it easier to clean and protect things like radiator grates from sawdust. You’ll also want to cover any fixtures or appliances in the room with tarps so that you don’t accidentally damage them when sanding. Next, sweep the floors thoroughly and dust mop them to get rid of any dirt or debris. It’s important that the floor is pristinely clean before you begin, as any dust left on the surface can cause it to scratch or create a dull finish when you apply the stain. You should also make any repairs to gouges and cracks in the floor.

Sanding the floor isn’t an easy job, and it’s essential to follow all the safety advice in your sanding kit. Wear a respirator or a face mask that can be adjusted to your size and shape, and always follow the instructions on the machine you’re using. A sanding machine with a drum-style sander is best, and it should be fitted with a sandpaper grade and grit appropriate to the floor. A coarse sandpaper is usually sufficient for a general resand, but you may need to switch to finer grits once you’ve gone over the entire surface area. Don’t forget to sand the edges of the room, and be sure to empty your dust bag regularly.

Staining is the final stage of the refinishing process, and this is where you’ll get to decide on the color you want your hardwood to be. Ideally, you should use oil-based stain, as it’s more durable and will protect the floor from moisture. However, if you’re concerned about the environmental impact, there are water-based stain options available that can be used with a varnish that’s low in VOCs.

Staining

A new coat of stain gives your hardwood floors a pop of color and can make the difference between a beautiful and just mediocre floor. Staining is a messy job so you will need to take precautions. Wearing gloves, masks and shoe covers will help keep the mess to a minimum. You should also thoroughly stir your stain before application to ensure that it is well mixed and has the correct color. Different woods react to stains differently, so it is important to test a small section of the flooring before committing to a larger area.

This is a good time to point out that it is possible to stain a hardwood floor without re-sanding it. The process is just a little more time-consuming, and you will need to do some research, but it can be done. You should still sand the floor after staining in order to ensure that the stain has properly adhered to the surface of the wood, and you should also make sure that the stain is a uniform color.

Once the stain is applied it should be left to dry according to the manufacturer’s directions. Once the stain has dried the floor can be wiped down with a damp cloth to remove any dust and grit that may have settled in the pores of the wood.

The final step is to apply a coat of finish. This is usually done with a low-VOC finish, and it should be allowed to dry for 24 hours between each coat. You will need to allow at least three coats of finish in order to achieve a good level of protection for your floors.

It is a good idea to hire a professional to perform the work of refinishing your hardwood floors. A reputable contractor will have an excellent track record, and they should be able to answer any questions that you may have. They should also be bonded and insured. It is also a good idea to check with the Better Business Bureau to see if any complaints have been filed against them. If there are complaints, it is worth contacting the contractor to find out how they were resolved.

Sealing

Before a new stain or finish is applied, the hardwood floor must be sealed. It’s important to use a high-quality, water-based sealant that will not yellow with age and is easy to clean up after. Oil-based polyurethane was the preferred choice for many years, but newer water-based options have improved greatly in terms of durability and moisture resistance. They are also less toxic than the old oil-based ones and have fewer fumes.

Before applying the final coat of sealant, lightly sand the floor again with a very fine grade of sandpaper (usually #220). This will ensure that the second coating adheres properly. Then vacuum the area thoroughly, and wipe it with a damp cloth to remove any remaining residue. Finally, allow the floors to dry completely before moving in furniture or allowing foot traffic on them.

Once the floor is sealed, you can enjoy a clean and shiny surface that will protect the wood from dirt and grime. It will also be easier to maintain and keep looking good than a natural unfinished wood.

When choosing a sealant, consider the color of your wood and what kind of finish you want to have on the floor. Penetrating sealers may be best if you’re concerned about water damage, while glossier finishes are better for those who prefer a more polished look.

If you’re not comfortable doing this project yourself, consider hiring a professional to take care of the work. The right contractor will have the experience and knowledge to do a top-notch job. In addition, they will be familiar with all the tools, techniques and procedures for sanding and refinishing. They’ll be able to help you choose the right stain and finish for your home, and they can provide you with a fair estimate of the cost of the job.

City Floor Supply offers a wide selection of stain and flooring products, including Bona’s full line of dust-free sanding and finishing equipment. They offer a complete package of services, from sanding to sealing, so you can get your hardwood floors looking just the way you’d like them with minimal disruption to your daily life.

Finishing

If you decide to stain the hardwood, it’s important that you do so in a color that coordinates with your other furnishings. It’s also a good idea to choose a semi-gloss finish, which will resist stains and keep the floor looking shiny for longer than a matte or satin finish would. Most stains have a wide range of colors, so it’s easy to find one that will complement your home. If you’re planning to do the staining yourself, be sure to use a good respirator and allow plenty of time for the project. You’ll also want to wait at least eight to 10 hours between each coat of finish, and you may need a week before walking on the floors or placing furniture again.

After the floors have been sanded, cleaned, and scuff-sanded again, it’s time to apply the finish. This process should be done carefully, since the wrong kind of finish can damage the wood. The most popular and durable choice is a polyurethane finish, which comes in both water-based and oil-based formulations. Both of these are easy to work with, but you’ll need to sand the finished floor lightly between coats. A water-based polyurethane has a mild odor and dries more quickly, while an oil-based finish has a strong odor and dries slowly.

You can use either a foam brush or a lamb’s-wool applicator to apply the finish, depending on the type you choose. Vacuum and scuff-sand the floors again between each application, using a pole sander with 100-grit sandpaper for a smooth finish. For a water-based finish, sand the floors with a vacuum and tack rag before applying another coat.

Wax finishes are a popular option in historic homes and among do-it-yourselfers, who like the low-sheen look that it provides. You’ll need to reapply wax periodically, and it can be difficult to buff, but it’s an excellent choice for those who enjoy a more natural look for their hardwood floors. Shellac is a high-gloss option that dries fast and emits few VOCs, but it can be difficult to apply and buff.